Need help creating a seller account on Amazon? Don’t look further because you have just landed on the right page.
Amazon is undoubtedly one of the best places to do online shopping. You can purchase almost anything, from daily groceries to clothing, electronics, video games, and toys. Amazon has more than 350 million buyers worldwide, which shows how wildly popular this platform is.
With such a huge number of established customers and immense traffic, Amazon can be the best platform to start a business. If you want to sell on Amazon, you can create a seller account by going through the seller registration process. However, you might need a helping hand in order to create an account on Seller Central.
In this post, I am going to share a step-by-step guide that will help you create an Amazon seller account. By the end of the article, you will know how you can give your seller account a verification badge that shows a sign of trust on Amazon.
Let’s get started.
Requirements To Create A Seller Account On Amazon
Seller registration on Amazon is a straightforward process. But it would be better if you possess all the information before registration. So let’s have a look at the crucial details you need for the seller’s registration:
- Your name, business name, and legitimate address
- A government-issued ID (an ID for your identification)
- Contact information (email and phone number)
- Address for Order Fulfillment (If you’re using FBM, provide the address from where you will ship orders)
- Bank Account Details (In this bank account, you will receive your money from the sale)
- Tax Information (SSN or your company’s Federal Tax ID)
- Business Entity (Your business name and type)
Once you have all these details, you can start creating a seller account on Amazon.
How To Create Amazon Seller Account
Creating a new account on Amazon Seller Central is very easy. All you have to do is follow these steps carefully.
Step 1. Compare Selling Plans on Amazon
If you want to sell on Amazon, you need to create an account on Amazon Seller Central. For that, head over to sell.amazon.com, which is the official Amazon website for sellers.
You can click on Sign Up to instantly start the registration process for a Seller Central account or compare the selling plans to consider which one is the best for your business.
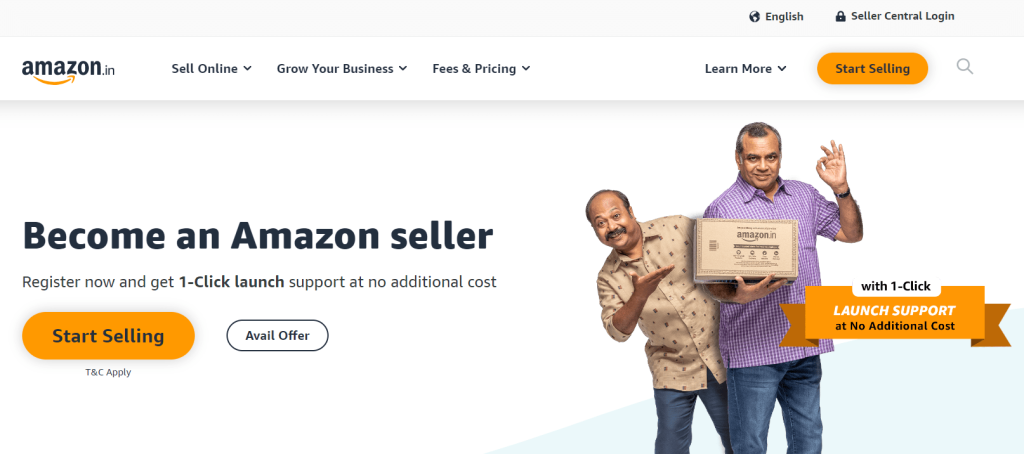
Head to the Pricing tab from the main menu to compare selling plans. In this tab, you will find four options. Choose the Compare Selling Plans option to see the available selling plans on Amazon.
Step 2. Choosing a Selling Plan
Currently, Amazon offers two selling plans to their sellers—Individual and Professional.
Individual: Individual plan is the basic selling plan of Amazon. If you are a beginner and want to sell only numbered items on Amazon, this plan is best for you. It allows you to sell 40 units per month. You will also get access to basic selling tools. If you choose the Individual selling plan for your business, Amazon will charge you $0.99/item (plus referral fee) on each successful sale. However, selling costs will be automatically deducted after each sale. It means you don’t have to pay any upfront charges with the Individual plan.
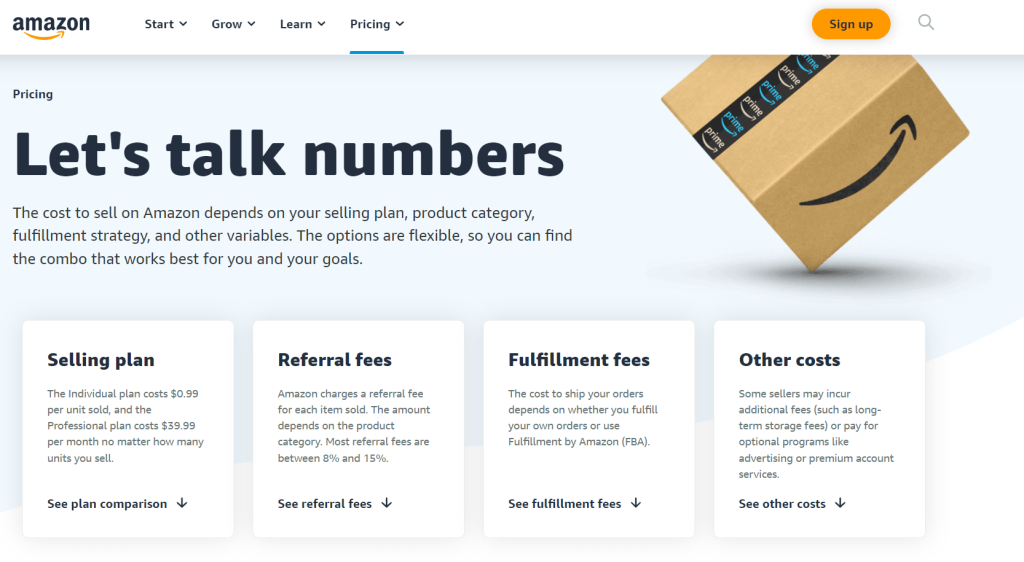
Professional: The Professional plan is for private label sellers or those who want to sell unlimited products on Amazon. With this plan, you can sell more than 40 products a month. Unlike the Individual plan, the Professional plan allows you to advertise your products. You will also get access to advanced selling tools such as bulk listings, standard reports, API integration, promotions, multiple-user logins, etc. Amazon charges $39.99/month (plus referral fee) for choosing the Professional plan. However, you need to pay the cost upfront.
Note: If you choose the Individual plan as your selling plan, you can’t advertise your products on Amazon, and you won’t be eligible for the Buy Box.
Click on the Sign-Up option under your preferred selling plan to move forward in this process.
Step 3. Create your Account on Seller Central
After choosing the selling plan, you will land on the Amazon Seller Central page. And here, you start the real process of Amazon seller account creation.
On this page, you can create a new account using your email address. Enter your email address and set up a new password. Then click on Next.
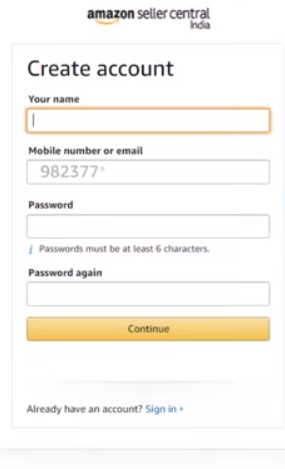
After that, it will ask you to verify your email address. You can simply open the verification email from your Gmail and approve the notification by clicking on the link. As soon as you click the link, you will automatically be taken to the next page in Seller Central.
Step 4. Describe your Business
On the next page, the system will ask you to select your business location. You can find and select your country from this option. (Be accurate with your location and address, as Amazon will verify all details submitted by you).
In the next section, they will ask you about your business type. You can select your business entity from these options:
- Charity
- Publicly-owned business
- State-owned business
- Privately-owned business
- None, I am an individual
Most businesses choose the “Privately-owned business” option as they are selling private label products. You can choose the individual option if your business is yet to form.
Next, enter your full name and click on Agree and Continue.
Step 5. Enter your Personal Details
On the next page, Amazon will ask for your personal information, which also includes an identification form.
Here’s what you need to fill up in this section:
- Country of Birth
- Date of Birth
- Country of Citizenship
- Country of Issue (The country where you are currently doing business)
- Proof of Identity (Driving license, passport number, or any other government-issued ID)
- Your complete business address (Street address, state/region, city, zip, or postal code)
- Your phone number
Make sure to provide the correct address, as Amazon will be sending you a postcard along with a verification number. It will arrive at your address within seven days. Keep this verification number safe, as you will need to submit it to complete the registration.
After filling in all the details, click on Next.
Step 6. Enter Billing Information
On the next page, you need to provide your billing information with Amazon. The billing information includes valid credit card details and the user’s bank account number. Before filling in billing details, read the policies and tap on the “I Understand” option. It will proceed you to the billing information page.
The system will prompt you to verify your bank details on this page. Bank details include Financial Institution Name, account holder name, country, 9-digit routing number, and bank account number. After entering the correct bank details, click on Verify Bank Account.
Once your bank details are verified, you will need to add your credit card details. Enter the card number, cardholder name, and card expiry date. Select the billing address you have added before, or enter a new billing address. Then click Next.
Step 7. Add Information about your Store and Product(s)
Once the system confirms your bank account and card validation, you will be asked to enter a few details about your products and Amazon store.
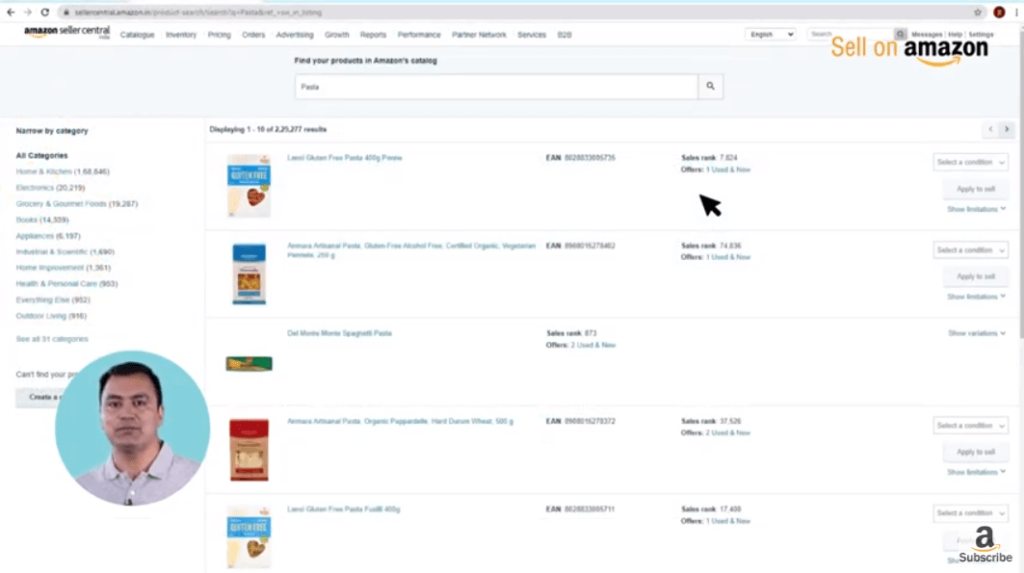
Before moving to the next phase of the seller’s registration process, confirm the following details:
- Name of your Amazon store
- Do you have a UPC code? (Yes or No)
- Do you have a diversity certification? (Yes or No)
- Do you own or manufacture your products? (Yes or No or Some of Them)
After providing all the information, click on Next.
Step 8. Identity Verification
On the next page, you need to verify your identity by uploading all the related images of the documents, ID, and bank account. Just go through each option and add relevant images for the respective section.
Once you have uploaded, click on Submit.
Step 9. Complete the Registration
This is the last step of your seller’s registration on Amazon. After uploading the relevant images, you will be taken to the final verification process.
On the screen, the system will show your address, where Amazon will send a postcard with a code. They will ask you to confirm the address.
As soon as you click on Confirm, it will show you the expected delivery time of the postcard. You can also track your postcard here.
Under this section, a verification box will also appear at the same time. Once you receive the postcard, enter the verification code in the box that you find in your delivery. Receiving the postcard is a time-consuming process, so you have to be very patient.
After filling in the code, click on Next, and the system will proceed you to your Amazon store.
This is how you can create your Amazon Seller account. Once it is created, you can start adding your product listing and stock your inventory to FBA fulfillment centers by creating a shipment.
Preparations for Selling on Amazon
If you are a beginner and want to run an online store on Amazon for the first time, you need to prepare some things before creating a store on Amazon. Consider working on the following aspects before creating a seller account on Amazon:
1. Decide a Business Model
Before you start anything, your first concern should be deciding on a business model for your Amazon store. Selecting a business model depends on your capital investment and team size. Here are some examples that will help you choose a suitable business model:
- Private Label: In this business model, retailers manufacture their own products or they source unbranded products from a manufacturing facility and then sell them under their own brand name. As of the private label agreement, manufacturing facilities don’t have control over their products once sold to the retailer. This is the most profitable business model, but you will need huge capital investment and resources.
- Arbitrage: In this business model, sellers can purchase low-cost products from discounted stores and resell them at a higher price. You can purchase such products from both online and retail stores as long as you are getting a discounted price.
- Dropshipping: In this model, you need to find a dropshipping supplier that will manufacture products and deliver them to your customer. Your part is only promoting those products on Amazon at a higher price, as you have to pay the base price and shipping fee to the supplier. The difference between the store price and the supplier’s price will be your profit.
- Wholesale: In this business model, you can purchase low-cost goods in bulk and sell individual units or bundles to generate profits.
- Handmade: Amazon Handmade is a separate program for creators and artists who make their products by hand. If you are a creator, you can sell in various Amazon categories, such as accessories, jewelry, home decor, and many others.
2. Find a Profitable Product to Sell
Once you have decided on a business model, you can start your research for a product to sell. On the Amazon marketplace, sellers have listed millions of products, so launching any random product can be risky. No matter what product you choose, it might be listed by other sellers for a long time. So you have to think out of the box in order to choose the product.
Here are a few points you can consider before choosing a product:
- It must be high-demand but low-competitive
- You must know all about your audience
- It can be easily sourced whenever necessary
- It has a high search volume
- Unique and cost-effective
Finding a product with such features can take time and effort for beginners. They can use an Amazon seller tool like Helium 10 or Jungle Scout to find a profitable product to sell. However, these tools are much more than just finding a product. They are capable of helping sellers throughout their selling journey and making their stores grow faster.
3. Consider Where to Source Products
Now you have found a product to sell, but from where are you going to source it? If you are a handmade seller or dropshipping seller, sourcing products won’t be an issue. But for other business models, sellers need to find a stable source of your products to keep their inventory stocked.
Sourcing products highly depends on your niche and business model, so you have to process according to it. You can look for local online or physical retailers if you are an arbitrage seller. Or, if you want to start a private label business, you can look for large manufacturing facilities and make a deal with them for future supplies.
Regardless of your business model or niche, websites like Alibaba, Costco Wholesale, Global Sources, etc., can be your one-stop hub for sourcing products. Here, you can source individual products or thousands of units according to your business needs and budget.
4. Choose a Fulfillment Method
Order fulfillment is one of the essential aspects of an eCommerce seller. Amazon sellers get two options to fulfill their orders: FBA and FBM.
FBA (Fulfillment by Amazon) is a fulfillment service offered by Amazon to its sellers. According to this method, Amazon takes care of order fulfillment processes, such as packing, labeling, and shipping, on behalf of the seller. All you have to do is send your inventory to Amazon fulfillment centers, and then Amazon will handle the rest. However, you need to pay FBA fees, such as storage fees, shipping fees, customer service, etc.
FBM (Fulfillment by Merchant) method is chosen by sellers who want to fulfill their orders on their own. Many sellers choose third-party services over the FBA method. With this method, you get more control over the services, packaging, and delivery. However, it is hard to win the Amazon Buy Box with this method, as fast shipping or on-time deliveries are not guaranteed.
How Much Does It Cost To Sell On Amazon?
As a beginner, you might need clarification about the charges you need to pay to sell on Amazon. However, you can start selling for free without spending a penny. But as your business changes gears, you will have to upgrade your account to Professional. Let’s see what type of charges you might have to pay to run a fully-fledged business on Amazon.
- Selling Fee: It is a regular selling fee that you have to pay according to the plan you have chosen.
- Referral Fee: The referral fee refers to the additional cost that Amazon charges on each sale, regardless of what selling plan you choose. Depending on the category, Amazon charges around 8% to 15% of each sale.
- Storage Fees: If you are an FBA seller, you store your inventory in Amazon Fulfillment Centers. They charge a storage fee of $6.90/cubic foot or $0.15/unit. However, these charges are imposed by Amazon associates depending on your inventory type.
- Fulfillment Fee: The fulfillment fee or FBA fee is charged by Amazon for sellers using the order fulfillment services. If you pay an FBA fee, Amazon handles your storage, packing, shipping, customer service, and even handling returns.
- Other Fees: If you want to use Amazon’s advertising option, you may have to pay additional charges. Apart from that, Amazon also charges for long-term inventory and aged inventory, but these are penalty charges that you can avoid by following guidelines.
Related Read:
- How To Sell On Amazon From Alibaba
- How To Prepare For Amazon Prime
- How To Make Money Selling On Amazon
- How To Sell On Amazon International Marketplace?
Conclusion: How To Create Amazon Seller Account
Amazon is a huge marketplace with millions of buyers around the world. Anybody can create a seller account and start selling on Amazon as long as they possess products to sell. If you want to sell on Amazon, you can follow the guide mentioned above and easily register yourself as an Amazon seller.
I hope this guide helped you with your purpose. If you have any queries regarding starting a business on Amazon, leave a comment in the comment section.
- 12 Best Dropshipping Stores For Sale (2024 Picks) - April 18, 2024
- Helium 10 Coupon Code & Discount 2024 – 35% OFF (April) - April 11, 2024
- When Does Amazon Stop Delivering (Updated 2024) - April 9, 2024

